
OpenClaw Installation & Setup
This guide describes the initial configuration of your OpenClaw instance immediately after the automated installation via the PowerPanel.
Once the PowerPanel has finished deploying your Ubuntu 24.04 or Debian 13 template with OpenClaw, the server is ready for the following security-oriented setup.
Step 1
Set up a Secure SSH Tunnel
For security reasons, the OpenClaw WebGUI is not publicly accessible. Create an encrypted tunnel from your local terminal:
Local Terminal
ssh -N -L 18789:127.0.0.1:18789 root@your-server-ip
Once the tunnel is active, you can access the interface locally at:
Browser URL (local)
http://localhost:18789/overview
Dashboard Preview
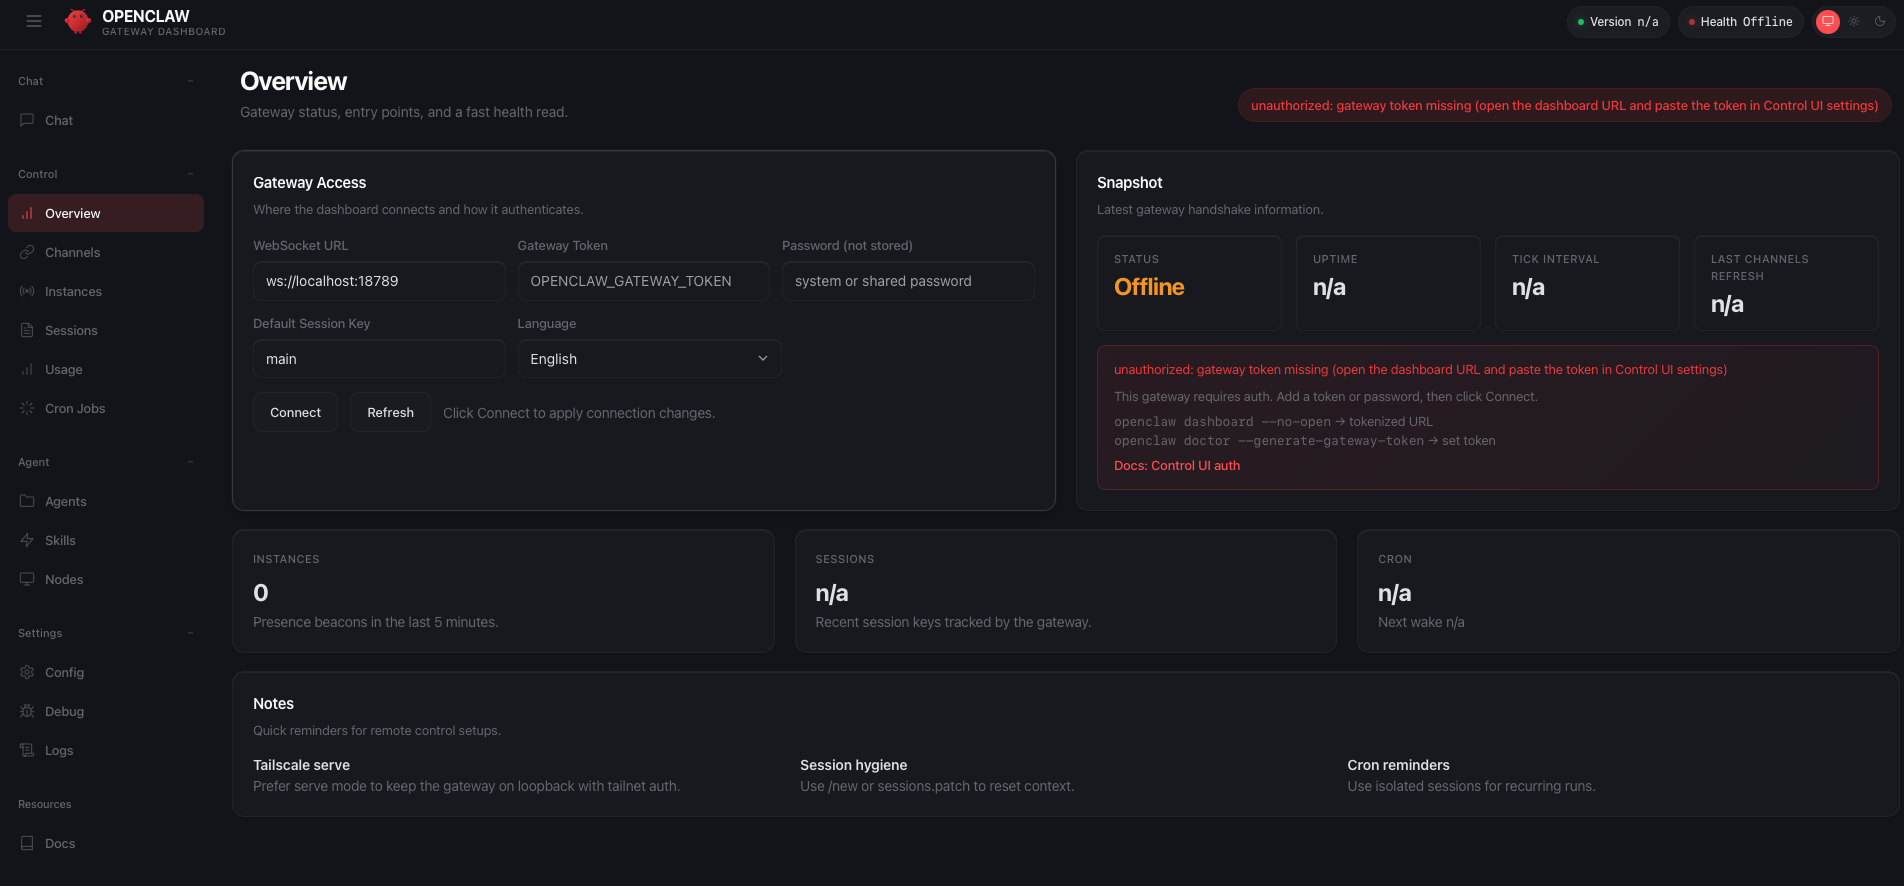
Note:This is the initial view. The status shows Offline because the Gateway Token hasn't been added yet.
Step 2
Authenticate Gateway Access
Log in to your server via SSH and retrieve your security token:
Server Terminal
cat /root/.openclaw/openclaw.json
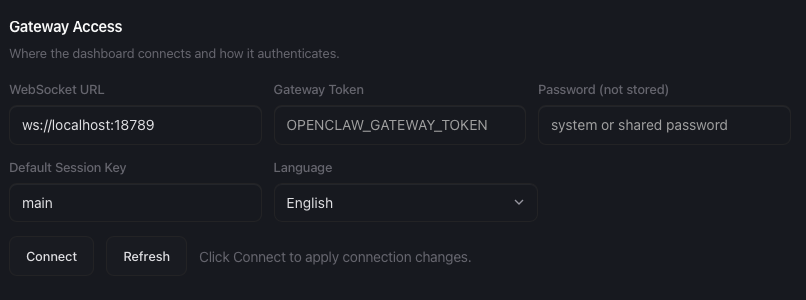
Copy the
gateway_token and paste it into the Gateway Token field in your browser.Enter your Root/Admin password. This is required to encrypt your current session and unlock the dashboard.
Step 3
CLI Onboarding & Advanced Configuration
Open a new terminal window (the first one is occupied by the tunnel). Connect via normal SSH:
Local Terminal (new window)
ssh root@your-server-ip
Once logged in, run the onboarding command on your server:
Server Terminal
openclaw onboard
1
Security Confirmation
Type
yes to confirm that the agent will have administrative access to your operating system.2
Mode & Configuration
Select QuickStart. When asked for configuration values, choose "Use existing values" to keep the pre-configured PowerPanel defaults.
3
AI Providers & API Keys
Paste your API key. Official links for key generation:
4
Messenger Integration
OpenClaw supports multiple platforms. Each requires a bot token or webhook:
Telegram:Create a bot via @BotFather to receive your token.
Discord / Slack / Matrix:Set up a webhook or a specialized bot user.
Skip:Type
skip if you only wish to use the Web Dashboard.5
Skill Selection
Select the skills you need. Use Space to toggle a skill and Enter to confirm:
| Skill | Function | API / Cost |
|---|---|---|
| 1password | Manage credentials & secrets. | Subscription & Key |
| github | Manage repos & issues. | Personal Token |
| open-whisper | Speech-to-text transcription. | OpenAI API |
| summarize | Summarize texts & websites. | Included |
| obsidian | Sync notes. | Free |
| blogwatcher | RSS & Blog monitoring. | Free |
| gifgrep | Integrated GIF search. | Giphy/Tenor Key |
| camsnap | Webcam snapshot. | Hardware Access |
| himalaya | CLI Email client. | SMTP/IMAP |
| nano-pdf | PDF data extraction. | Free |
| open-hue | Smart light control. | Bridge Link |
Managing Skills & Clawhub
Reconfiguration:To add or remove skills, open a new terminal session and run
openclaw onboard again.Clawhub (Skillhub):Use the
skillhub command to search for and download community-developed skills. Note: This is also where you receive public updates for your agent.Learn more about Skills
6
Enable System Hooks
In the final step, you'll be asked to Enable Hooks. These are essential for the agent's system integration:
session-memory:Allows the agent to store context between different chat sessions.
command-logger:Keeps a log of executed terminal commands for troubleshooting.
bootstrap-extra-files:Prepares the environment for specialized skills requiring additional dependencies.
boot-md:Generates a system status report in Markdown format upon startup.
Script for new:Automates the initial setup of new workspaces or environments.
Learn more about Hooks
Gateway Service Selection
The Gateway Service (WebGUI) is already pre-installed via PowerPanel. If onboarding asks to install it, simply type
skip to finish the setup.Final Step: Starting the Bot
At the very end, you'll be asked: "How do you want to start your bot?". This determines how you interact with OpenClaw right now:
Watch in TUI (Recommended):Opens the Terminal User Interface directly in your SSH session. Great for immediate testing and monitoring logs.
Open the Web UI:Provides the URL to the Web Dashboard. Since your SSH tunnel (Step 1) is active, refresh
localhost:18789 in your browser.Do this later:Finishes onboarding and returns to the command line. You can start the agent anytime using
openclaw run.Initial Setup Complete?
Learn how to harden your server and protect your data.
To the Security Guide